Beauty Updates

แป้งผสมรองพื้นคืออะไร? ต่างจากแป้งพัฟ แป้งฝุ่นยังไง เลือกยังไงไม่ให้หน้าหนา
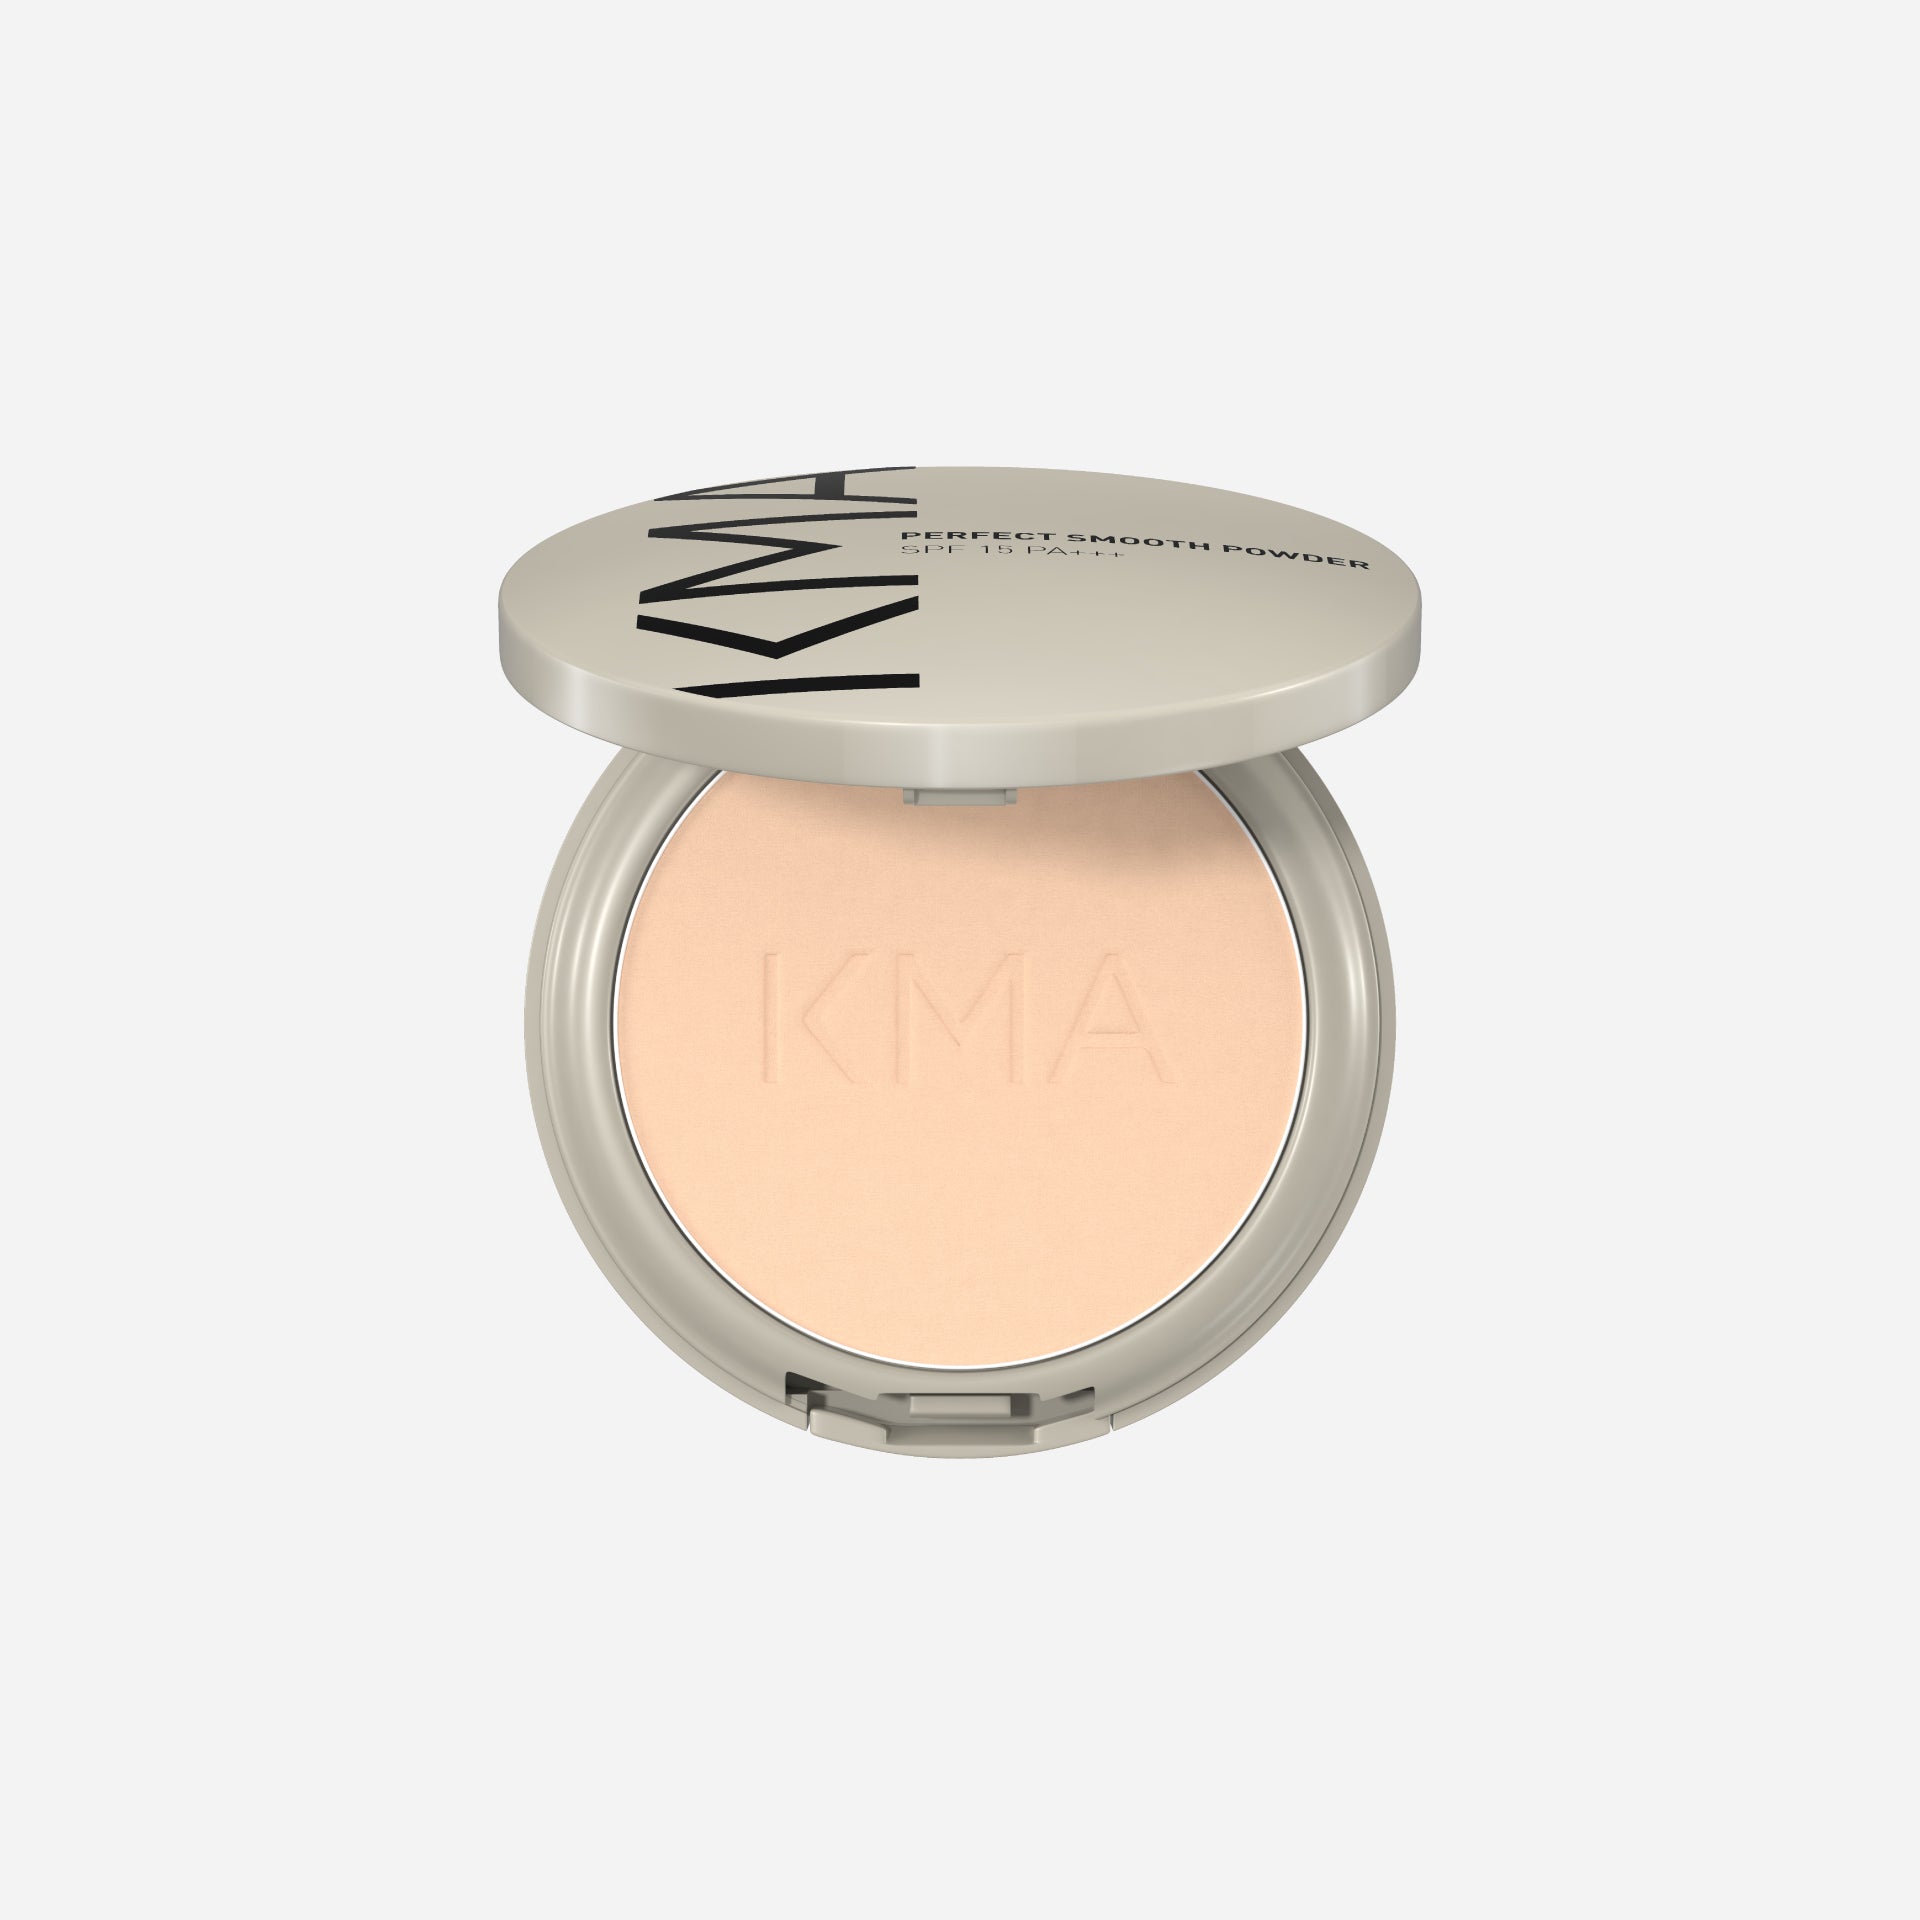
อยากได้งานผิวเรียบเนียน แต่ไม่อยากลงรองพื้นหลายขั้นตอนให้รู้สึกหนักผิว แป้งผสมรองพื้น หรือ Powder Foundation เป็นอีกหนึ่งตัวเลือกที่ช่วยทั้งปรับสีผิว เพิ่มการปกปิด และช่วยเซตงานผิวได้ในขั้นตอนเดียว เหมาะกับวันที่ต้องการแต่งหน้าเร็ว หรือคนที่อยากลดจำนวนขั้นตอนของ Base Makeup โดยยังต้องการให้งานผิวดูเรียบเนียนค่ะ แป้งผสมรองพื้นคืออะไร แป้งผสมรองพื้น คือผลิตภัณฑ์งานผิวในรูปแบบแป้งอัดแข็งที่มีเม็ดสีสำหรับช่วยปรับสีผิวและเพิ่มการปกปิด จึงทำหน้าที่ได้มากกว่าแป้งที่ใช้สำหรับเซตผิวเพียงอย่างเดียว โดยทั่วไปสามารถใช้ได้ 2 รูปแบบหลัก 1. ใช้เดี่ยว ๆ เป็น Base Makeup หลังลงสกินแคร์และกันแดด สามารถลงแป้งผสมรองพื้นเพื่อช่วยปรับสีผิวและเพิ่มการปกปิดได้เลย เหมาะกับวันที่ต้องการแต่งหน้าเร็ว หรือไม่อยากลงรองพื้นแบบลิควิดหลายขั้นตอน 2. ใช้ร่วมกับรองพื้น หากต้องการการปกปิดเพิ่ม สามารถใช้แป้งผสมรองพื้นกดเฉพาะบริเวณที่ยังเห็นรอยหรือสีผิวไม่สม่ำเสมอ แทนการลงผลิตภัณฑ์หนาทั่วทั้งใบหน้า แป้งผสมรองพื้นต่างจากแป้งทั่วไปและรองพื้นอย่างไร คำว่า “แป้ง” ในเมคอัพมีหลายประเภท และแต่ละแบบมีหน้าที่แตกต่างกันค่ะ ประเภท หน้าที่หลัก การปกปิด เหมาะกับ แป้งผสมรองพื้น ปรับสีผิว เพิ่มการปกปิด และเซตงานผิว ปานกลาง–สูง ขึ้นอยู่กับสูตร คนที่อยากได้งานผิวเรียบเนียนในขั้นตอนเดียว แป้งอัดแข็งทั่วไป เซตผิว ลดความเงา หรือปรับผิวเล็กน้อย บางเบา คนที่มี Base Makeup อยู่แล้ว แป้งฝุ่น เซตรองพื้นหรือคุชชั่น ลดความมันส่วนเกิน น้อย คนที่ต้องการเซตงานผิวโดยไม่เพิ่ม Coverage มาก รองพื้นลิควิด ปรับสีผิวและเพิ่มการปกปิด มีหลายระดับ คนที่ต้องการเลือก Coverage และ Finish ได้หลากหลาย จำง่าย ๆ คือ ต้องการเซตงานผิว → แป้งฝุ่นต้องการทั้งปรับผิวและเพิ่มการปกปิด → แป้งผสมรองพื้น แป้งผสมรองพื้นใช้แทนรองพื้นได้ไหม แป้งผสมรองพื้นสามารถใช้เป็น Base Makeup ได้โดยไม่ต้องลงรองพื้นลิควิดก่อน โดยเฉพาะในวันที่ต้องการ Routine สั้น ๆ ตัวอย่างง่าย ๆ คือ สกินแคร์ → กันแดด → แป้งผสมรองพื้น → พอยต์เมคอัพ เหมาะกับวันที่ ต้องการแต่งหน้าเร็ว ไม่อยากลงงานผิวหลายชั้น ต้องการพกไปเติมระหว่างวัน ชอบงานผิวที่ดูเรียบเนียนและไม่ฉ่ำมากเกินไป ส่วนวันที่ต้องการการปกปิดมากขึ้น สามารถลงรองพื้นบาง ๆ ก่อน แล้วใช้แป้งผสมรองพื้นเพิ่มเฉพาะบริเวณที่ต้องการ เช่น ข้างจมูกหรือรอยต่าง ๆ บนผิวค่ะ เลือกแป้งผสมรองพื้นอย่างไรให้เหมาะกับงานผิว 1. ดูระดับการปกปิด หากมีรอยหรือสีผิวไม่สม่ำเสมอค่อนข้างชัด อาจเลือกสูตรที่ให้การปกปิดสูงขึ้น แต่ถ้าต้องการลุคธรรมชาติสำหรับใช้ทุกวัน การปกปิดระดับกลางจะควบคุมความหนาของงานผิวได้ง่ายกว่า 2. เลือก Finish ให้เหมาะกับผิว สำหรับผิวมันหรือผิวผสม อาจมองหาฟินิชแบบ Matte หรือ Soft Matte ที่ช่วยลดความเงาบนผิว ส่วนผิวแห้ง ควรให้ความสำคัญกับการเตรียมผิวและเลือกสูตรที่ไม่ทำให้งานผิวดูแห้งหรือเน้น Texture มากเกินไป 3. เลือกเฉดสีให้ใกล้กับผิว เพราะแป้งผสมรองพื้นมีเม็ดสีและให้ Coverage มากกว่าแป้งเซตผิว การเลือกเฉดสีจึงมีผลกับความกลมกลืนของงานผิวโดยตรง ควรพิจารณาทั้ง ระดับความสว่างของผิว Undertone สีบริเวณใบหน้าและลำคอ หากสามารถทดลองได้ ควรเทียบบริเวณแนวกรามในแสงธรรมชาติค่ะ 4. ดูว่าจะใช้แบบไหนในชีวิตประจำวัน ถ้าต้องการใช้แทนรองพื้น ควรเลือกสูตรที่สามารถเพิ่มระดับการปกปิดได้ตามต้องการ แต่หากต้องการใช้ร่วมกับรองพื้นหรือเติมระหว่างวัน ควรให้ความสำคัญกับเนื้อสัมผัสที่สามารถเติมได้โดยไม่ทำให้งานผิวดูหนาเกินไป วิธีลงแป้งผสมรองพื้นให้เหมาะกับสภาพผิว สำหรับผิวมัน เริ่มจากลงบาง ๆ ทั่วใบหน้า แล้วเพิ่มเฉพาะบริเวณที่มันง่าย เช่น หน้าผาก จมูก ข้างจมูก คาง ระหว่างวัน หากผิวเริ่มมีความมัน ควรซับความมันส่วนเกินก่อน แล้วจึงกดแป้งเพิ่มในปริมาณเล็กน้อย เพื่อลดการสะสมของแป้งหลายชั้นบนผิว สำหรับผิวแห้ง การเตรียมผิวมีความสำคัญมาก ควรเติมความชุ่มชื้นให้เหมาะสมและรอให้สกินแคร์กับกันแดดเซตตัวก่อนลงแป้ง เวลาลงแป้ง ให้ใช้วิธีกดพัฟเบา ๆ และเริ่มจากปริมาณน้อย โดยเฉพาะบริเวณที่แห้งหรือเป็นขุยควรหลีกเลี่ยงการลงแป้งซ้ำหลายชั้นค่ะ KMA Perfect Smooth Powder SPF15 PA+++ สำหรับคนที่กำลังมองหา แป้งผสมรองพื้น KMA หนึ่งในตัวเลือกคือ KMA Perfect Smooth Powder SPF15 PA+++ เป็นแป้งผสมรองพื้นที่เน้นการปกปิด ช่วยให้งานผิวดูเรียบเนียน พร้อมช่วยควบคุมความมัน และมาในรูปแบบตลับที่พกพาสะดวก สามารถใช้ได้ทั้ง ใช้เดี่ยวในวันที่ต้องการแต่งหน้าเร็ว ใช้เพิ่มการปกปิดเฉพาะจุด พกสำหรับเติมงานผิวระหว่างวัน จึงเหมาะกับคนที่ต้องการ Base Makeup ที่ใช้งานง่ายและไม่ต้องลงผลิตภัณฑ์หลายขั้นตอน หากกำลังเลือกระหว่างแป้ง KMA แต่ละรุ่น สามารถอ่านต่อที่ เปรียบเทียบ KMA Perfect Smooth และ Cover Gripe เพื่อดูความแตกต่างของการปกปิดและงานผิวของแต่ละสูตรค่ะ คำถามที่พบบ่อย Q: แป้งผสมรองพื้นกับแป้งพัฟเหมือนกันไหม A: คำว่า “แป้งพัฟ” มักใช้เรียกแป้งตลับที่ใช้ร่วมกับพัฟในภาพรวม แต่ไม่ได้หมายความว่าแป้งพัฟทุกสูตรจะเป็นแป้งผสมรองพื้นค่ะ จุดที่ควรดูคือคุณสมบัติของผลิตภัณฑ์ว่าเน้นการเซตผิว หรือมีการปกปิดในระดับที่สามารถใช้เป็น Base Makeup ได้ Q: ไม่ลงรองพื้น ใช้แค่แป้งผสมรองพื้นได้ไหม A: สามารถใช้เดี่ยวได้ โดยหลังจากลงสกินแคร์และกันแดดแล้ว สามารถใช้แป้งผสมรองพื้นเพื่อช่วยปรับสีผิวและเพิ่มการปกปิดได้เลย Q: ใช้แป้งผสมรองพื้นร่วมกับรองพื้นได้ไหม A: สามารถใช้ร่วมกันได้ โดยควรลงรองพื้นในปริมาณพอดี แล้วใช้แป้งผสมรองพื้นเพิ่มเฉพาะบริเวณที่ต้องการ Coverage มากขึ้น เพื่อลดความหนาของงานผิว Q: ผิวมันเหมาะกับแป้งผสมรองพื้นไหม A: ผิวมันสามารถใช้ได้ โดยควรเลือกสูตรและวิธีลงให้เหมาะกับผิว ลงในปริมาณบาง ๆ และซับความมันส่วนเกินก่อนเติมแป้งระหว่างวัน สรุป แป้งผสมรองพื้นเหมาะกับใคร แป้งผสมรองพื้นเป็นทางเลือกสำหรับคนที่ต้องการ ปรับสีผิว + เพิ่มการปกปิด + เซตงานผิว โดยไม่ต้องใช้ Base Makeup หลายขั้นตอน เหมาะเป็นพิเศษกับคนที่ต้องการแต่งหน้าเร็ว พกเติมระหว่างวัน หรือชอบงานผิวที่เรียบเนียนและมี Coverage มากกว่าแป้งทั่วไป สิ่งสำคัญคือเลือกให้เหมาะกับ ระดับการปกปิด ฟินิช เฉดสี และสภาพผิว เพราะแป้งผสมรองพื้นแต่ละสูตรให้ผลลัพธ์แตกต่างกันค่ะ

How to Wash Your Face Properly for Clean Skin and Less Buildup and Clogged Pores
Cleansing your face is a basic step we do every day. However, washing your face “clean” does not mean scrubbing hard, washing several times, or making your skin feel tight and squeaky clean afterward. Throughout the day, your skin is exposed to oil, sweat, dust, sunscreen, skincare, and makeup. If your skin is not cleansed properly, these can remain on the skin. At the same time, over-cleansing may leave your skin feeling dry, tight, and uncomfortable. The key to proper facial cleansing is simple: remove what your skin does not need without disturbing it more than necessary. Why Is Proper Facial Cleansing Important? Our skin collects more than just dust and oil. We also use different products throughout the day, such as sunscreen, foundation, cushion, and long-lasting makeup. When these products mix with oil and sweat, they may remain on the skin if not properly removed. Some areas are also easy to miss, such as around the nose, jawline, hairline, and chin. Proper cleansing helps remove: Excess oil Dust and dirt Sweat Sunscreen Makeup and product residue It also prepares your skin for the next steps in your skincare routine. 7 Steps to Wash Your Face Properly 1. Wash Your Hands Before Touching Your Face One of the easiest steps to forget is washing your hands. Throughout the day, your hands touch phones, desks, keyboards, doors, and many other surfaces. Before touching your face, wash your hands thoroughly. This helps prevent additional dirt from your hands from coming into contact with your skin. 2. Remove Makeup First on Makeup Days Facial cleansers and makeup removers have different purposes. If you wear foundation, cushion, long-lasting makeup, or waterproof makeup, start with a makeup remover such as a cleansing balm or makeup remover. Then follow with a facial cleanser to clean the skin again. This method is called Double Cleansing and separates cleansing into two steps: First step: Remove makeup, sunscreen, and products that stay on the skin. Second step: Remove excess oil, dirt, and remaining residue. This is especially useful when wearing waterproof or long-lasting makeup, as proper cleansing helps reduce makeup residue left on the skin. 3. Use Water at a Comfortable Temperature Wet your face with clean water before applying your facial cleanser. Water that is too hot may make the skin feel dry and tight. Room-temperature or slightly warm water is usually a better choice. The most important thing is not using hot water, but cleansing thoroughly and rinsing the product completely from your skin. 4. Use the Right Amount of Facial Cleanser Using more cleanser does not always mean better cleansing. Use an appropriate amount according to the product instructions, then spread or lather the cleanser before applying it to your face. If your skin often feels dry or tight after cleansing, look for a gentle formula that cleans without removing more natural oils than necessary. One option is Amino Acid Cleansing, which focuses on removing dirt and excess oil while helping the skin feel comfortable after cleansing. 5. Massage Gently Without Scrubbing Use your fingertips to gently massage the cleanser over your face in circular motions. Pay extra attention to areas where oil and product residue can easily build up, such as: Forehead Around the nose Chin Jawline Hairline Cleansing every area thoroughly is more important than scrubbing harder. Rubbing or scrubbing too strongly can increase friction and may leave the skin feeling irritated, dry, or tight. 6. Rinse Thoroughly After cleansing, rinse your face thoroughly with clean water. Check areas such as the hairline, jawline, around the nose, and under the chin, as cleanser can easily remain in these areas. Proper cleansing is not only about removing dirt. It also means making sure no cleansing product is left behind on the skin. 7. Gently Pat Your Face Dry After washing, use a clean towel to gently pat your skin dry instead of rubbing your face. Then continue with your regular skincare routine, especially moisturizing products that suit your skin type. After cleansing, your skin should feel clean and comfortable, without excess oil or uncomfortable tightness. How Many Times a Day Should You Wash Your Face? A basic cleansing routine can be divided into morning and evening. Morning Morning cleansing helps remove oil, sweat, and residue that may build up while you sleep before applying skincare, sunscreen, and makeup. Evening Evening cleansing is especially important because your skin has been exposed to oil, sweat, dust, sunscreen, and makeup throughout the day. If you exercise or sweat heavily, cleanse your skin appropriately after the activity. Avoid washing repeatedly to the point that your skin feels dry or tight. How Can Proper Cleansing Help Reduce Clogged Pores? Acne and clogged pores can have many causes, so facial cleansing alone cannot prevent all breakouts. However, proper cleansing can help reduce substances that may build up on the skin, including: Excess oil Makeup Sunscreen Sweat Dirt Product residue The goal is not to cleanse as aggressively as possible, but to reduce residue without over-cleansing the skin. If you continue to experience acne, severe inflammation, or frequent breakouts even with proper cleansing, other factors may also need to be considered because acne is not caused by cleanliness alone. Cleansing Habits to Avoid Even when you choose a suitable cleanser, the way you wash your face can still affect how your skin feels afterward. Washing Until Your Skin Feels Squeaky Clean A squeaky-clean feeling does not always mean your skin is cleaner. If your skin feels very tight or rough after washing, it may have been cleansed more than necessary. Washing Too Often Because of Oily Skin Having oily skin does not mean you need to use a facial cleanser every time your skin feels oily. Cleansing too frequently may leave your skin feeling dry or uncomfortable. Using Very Hot Water Hot water may make the skin feel drier, especially if your skin is already dry or dehydrated. Scrubbing Hard to Get Cleaner Skin More pressure does not necessarily provide better cleansing. Instead, it increases friction on the skin. Using Unclean Towels or Accessories Items that regularly touch your face, such as face towels, bath towels, and pillowcases, should be cleaned regularly. How to Choose the Right Facial Cleanser A good facial cleanser should remove dirt and excess oil while leaving the skin feeling comfortable after washing. If your skin easily feels dry or tight after cleansing, look for a formula that focuses on gentle cleansing, hydration, and skin barrier care. KMA Skin Sync Facial Wash is developed with the Clean & Sync concept and combines: Amino Acid Cleansing to gently cleanse the skin 7X Ceramide to help support the skin barrier 13D Hyaluronic Acid to help provide hydration pH Balance to help maintain the skin’s natural balance It is designed for daily cleansing, leaving the skin feeling clean, soft, and comfortable without excessive tightness, ready for the next steps in your skincare and makeup routine. Frequently Asked Questions About Facial Cleansing Q: How long should I wash my face? A: Washing for longer does not always mean better cleansing. The important thing is to spread the cleanser evenly across the face, pay attention to areas where oil and residue may build up, and rinse thoroughly without rubbing too hard or cleansing for too long. Q: Do I need to double cleanse if I do not wear makeup? A: It depends on the products you use that day, especially sunscreen or waterproof and long-lasting products. Your cleansing routine should match what is on your skin rather than following the same double-cleansing routine every day. Q: Should oily skin be washed more often than dry skin? A: Having oily skin does not always mean you need to wash your face more frequently. The goal is to remove excess oil without leaving the skin overly dry or tight. Consider your daily activities and how your skin feels after cleansing. Q: Why do I still get acne even when I wash my face properly? A: Acne can be caused by several factors, including excess oil, clogged pores, inflammation, hormones, and the products you use. Cleansing is an important step for reducing residue on the skin, but it is not the only factor that affects breakouts. Q: How should my skin feel after washing? A: Your skin should feel clean and free from excess oil or residue while still feeling soft and comfortable, without excessive dryness or tightness. Summary: Proper Cleansing Is About Finding the Right Balance Good facial cleansing is not measured by how much foam you use, how squeaky your skin feels, or how many times you wash your face. What matters is removing dirt and excess oil while keeping your skin comfortable. Start by washing your hands, remove makeup when necessary, choose a cleanser that suits your skin, massage gently, rinse thoroughly, and pat your skin dry without rubbing. With these simple steps, daily facial cleansing can help reduce residue and prepare your skin for the next steps in your skincare routine.

Is Squeaky-Clean Skin Really Good? Discover Amino Acid Cleansing for Clean Skin Without Dryness or Tightness
Facial cleansing is a basic skincare step that can affect your skin more than you may think. Besides removing excess oil, dust, and dirt that build up throughout the day, cleansing should also help maintain the skin’s natural balance. Many people are familiar with the “squeaky clean” feeling after washing and may think it means the skin is very clean. However, tight or rough-feeling skin after cleansing may happen when too much natural oil and moisture have been removed. This is where Amino Acid Cleansing comes in. It focuses on gentle cleansing to remove dirt and excess oil without leaving the skin feeling overly dry or tight. Why Does Skin Feel Dry and Tight After Cleansing? The outer layer of the skin contains not only skin cells but also water and lipids that help maintain moisture and support the Skin Barrier. When a cleanser removes more natural oil than necessary, you may notice: Tight or rough-feeling skin A squeaky-clean feeling Dryness in some areas Less softness Discomfort after cleansing For people who wear makeup regularly, dry or unbalanced skin may also make foundation or cushion harder to apply smoothly, especially on dry or flaky areas. The goal of cleansing is therefore not to remove all oil from the skin, but to remove excess oil and dirt while keeping the skin comfortable and ready for the next skincare steps. What Is Amino Acid Cleansing? Amino Acid Cleansing is a cleansing system that uses cleansing agents related to amino acids and is commonly used in formulas designed for gentle cleansing. These cleansing agents interact with both water and oil, helping remove dirt, excess oil, and residue from the skin when rinsing. The key idea behind Amino Acid Cleansing is balanced cleansing: removing what the skin does not need while reducing excessive removal of the moisture and lipids that the skin still needs. “Squeaky Clean” Does Not Always Mean Cleaner Skin Skin cleanliness should not be measured only by how tight or squeaky your skin feels after washing. A cleanser that leaves the skin feeling very squeaky may create an immediate feeling of cleanliness. However, if your skin feels very tight afterward, it may mean that more natural oil has been removed than necessary. Instead, pay attention to how your skin feels after cleansing: Skin feels clean Excess oil and residue are removed Skin does not feel dry or tight Skin still feels soft and comfortable This is why modern cleansers focus not only on cleansing performance but also on how the skin feels after washing. More Foam Does Not Always Mean Better Cleansing Foam is created by the properties of cleansing agents and other ingredients in the formula, but the amount of foam does not directly indicate how well a product cleans. A low-foam cleanser can still remove oil and dirt effectively when its cleansing system is properly formulated. When choosing a facial cleanser, consider: The cleansing system Your skin type How your skin feels after cleansing Whether the product is suitable for regular use Rather than choosing a cleanser based only on how much foam it produces. Which Skin Types Are Suitable for Amino Acid Cleansing? Oily Skin Oily skin still needs excess oil to be removed, but the skin does not need to feel tight after cleansing. Choosing a gentle cleansing formula can help remove excess oil without making the skin feel overly stripped. Dry and Dehydrated Skin For skin that becomes dry easily, it is important to avoid cleansing products that leave the skin feeling tight or uncomfortable. Amino Acid Cleansing is a good option for those who want clean skin while maintaining a soft and moisturized feeling after washing. Combination Skin Combination skin has both oily and dry areas. A balanced cleansing formula can help avoid over-cleansing dry areas while still removing excess oil from the T-zone. Why Do Some Facial Cleansers Contain Ceramide and Hyaluronic Acid? Cleansing is only one part of a facial cleanser. Some formulas also include ingredients that help support skin hydration and the Skin Barrier. Ceramides are lipids that are part of the skin barrier and help reduce moisture loss. Hyaluronic Acid is known for its ability to hold water and is commonly used in skincare products designed to support skin hydration. This changes the idea of facial cleansing from simply: “Removing dirt” to: “Cleansing while helping care for the skin after washing.” KMA Skin Sync Facial Wash and the Clean & Sync Concept KMA Skin Sync Facial Wash was developed with the Clean & Sync concept, combining cleansing and skin balance care in one step. The formula features: Amino Acid Cleansing to gently cleanse the skin 7X Ceramide to help support the Skin Barrier 13D Hyaluronic Acid to help provide hydration pH Balance to help maintain the skin’s balance The concept goes beyond simply cleansing the skin. It is designed to leave the skin feeling soft, moisturized, and ready for the next steps in your skincare or makeup routine. How Does Facial Cleansing Affect Makeup? Smooth-looking makeup does not always start with foundation. It starts with the condition of your skin before makeup. If your skin feels dry, tight, or flaky after cleansing, foundation may cling to dry areas. On the other hand, if too much oil or residue remains on the skin, makeup may not apply as smoothly. Before applying makeup, the skin should ideally feel: Clean + Comfortable + Balanced You can then continue with skincare, sunscreen, and makeup. How to Use KMA Skin Sync Facial Wash Use in the morning and evening. Wet your face with clean water. Apply an appropriate amount of the product. Work the product into a lather. Gently massage over the entire face. Rinse thoroughly with clean water. Gently pat the skin dry and follow with your skincare routine. On days when you wear waterproof or long-lasting makeup, use a makeup cleanser first to remove the makeup, then follow with Facial Wash to cleanse the skin. Frequently Asked Questions About Amino Acid Cleansing Q: Is Amino Acid Facial Cleanser suitable for oily skin? A: Yes. Amino Acid Cleansing can be used on oily skin to help remove excess oil and dirt while reducing the feeling of dryness or tightness after cleansing. The important thing is to choose a formula that suits your overall skin condition. Q: Does squeaky-clean skin mean my face is cleaner? A: Not necessarily. A squeaky-clean feeling may occur when a large amount of natural oil has been removed from the skin. Instead of using this feeling as the only sign of cleanliness, your skin should feel clean, comfortable, and not overly tight after washing. Q: Can a low-foam cleanser still clean the skin effectively? A: Yes. Cleansing performance depends on the cleansing system used in the formula, not only on the amount of foam. A low-foam cleanser can still effectively remove excess oil and dirt. Q: Can Facial Wash alone remove waterproof makeup? A: Waterproof and long-lasting makeup should first be removed with a suitable makeup cleanser. Follow with Facial Wash to cleanse the skin and remove remaining residue. Summary Amino Acid Cleansing is a gentle approach to facial cleansing that helps remove dirt and excess oil while reducing excessive removal of the moisture and natural lipids the skin needs. When choosing a facial cleanser, the important question is not only “How clean does my skin feel?” but also whether your skin still feels soft, comfortable, and free from excessive dryness or tightness. When your skin is properly cleansed, it is ready for the next steps in your skincare, sunscreen, and makeup routine.

Why Does Makeup Become Patchy? Causes and How to Fix It
Your makeup may look smooth in the morning, only for the foundation to become patchy, settle into lines, or wear off in certain areas a few hours later. This problem is not always caused by the foundation itself. It may also be related to skin preparation, the amount of skincare applied, the foundation formula, and how you touch up your makeup during the day. This article explains the most common causes and practical solutions to help reduce patchy makeup, especially in hot and humid climates such as Thailand. What Does Patchy Makeup Look Like? Patchy makeup occurs when foundation or powder does not sit evenly on the skin. It may appear uneven, separate into layers, settle into lines, or wear away in certain areas throughout the day. Before trying to fix the problem, check how the patchiness appears: The skin looks dry, flaky, or creased. The foundation slips or separates. Makeup wears away around the nose or smile lines. Powder becomes cakey after touch-ups. The foundation looks thick and does not blend naturally with the skin. The way your makeup becomes patchy can help identify which step needs to be adjusted. Quick Guide to the Causes and Solutions Cause Common Signs Suggested Solution Dehydrated skin Foundation clings to dry areas or settles into lines Add lightweight hydration before makeup Too much skincare Foundation slips or separates Reduce the number of layers and allow skincare to absorb Unsuitable foundation formula Makeup wears off quickly or looks too dry Choose a formula suited to your skin type Too much foundation Makeup looks thick or cakey Apply thin layers and build only where needed Incorrect powder application Skin becomes oily and foundation moves Apply a light layer of powder only where necessary Powder applied over excess oil Powder becomes thick and patchy Blot away oil before touching up Heat and humidity Foundation wears away with sweat Choose a water- and sweat-resistant formula 1. The Skin Is Dehydrated or Not Prepared Properly Both dry and oily skin can become dehydrated. When the skin lacks moisture, foundation may cling to dry areas, emphasise flakes, settle into lines, or appear uneven. On the other hand, applying too many skincare layers or using rich creams in excessive amounts may cause foundation to slip and separate. How to Fix It Use lightweight skincare in an appropriate amount. Apply extra hydration only to areas that feel dry. Allow skincare and sunscreen to absorb before applying makeup. Avoid layering more products than necessary. Choose a primer that addresses your specific skin concern. The skin does not necessarily need a large amount of skincare before makeup. It needs the right amount and enough time for each layer to settle. 2. The Foundation Does Not Suit Your Skin Type Different foundations have different textures and finishes. Choosing a formula that does not suit your skin type may prevent the makeup from sitting smoothly. For example, a very dewy formula may move easily on oily skin. A matte formula may emphasise dryness and fine lines on dry skin when the skin has not been prepared properly. For Oily or Combination Skin Choose a foundation that helps control excess oil. Look for water- and sweat-resistant formulas. Set the forehead, nose, and chin with a light layer of powder. For Dry Skin Hydrate the skin before applying makeup. Choose a blendable foundation that does not make the skin appear overly dry. Avoid applying a heavy layer of powder across the entire face. For Combination Skin Adjust products according to the needs of each area. Add hydration to the cheeks. Control shine only on the T-zone. 3. Applying Too Much Foundation Using more foundation does not always create better coverage. The thicker the layer, the more likely it is to build up and become patchy when exposed to oil, sweat, or facial movement. How to Apply Foundation in Thin, Smooth Layers Begin with a small amount of foundation. Apply from the centre of the face and blend outward. Press or tap the product into the skin instead of rubbing it. Build coverage only in areas that need it. Avoid repeatedly layering foundation over the entire face. This technique helps control the thickness of the base and reduces the chance of the foundation becoming cakey during the day. 4. Applying Too Much or Too Little Powder Not setting the skin at all may allow foundation to move when it comes into contact with oil. However, applying too much powder can make the complexion look heavy, dry, and creased. How to Set Makeup Properly Use a small amount of powder. Tap off excess powder before applying it to the skin. Focus on areas that become oily easily, such as the forehead, nose, and chin. Use only a light amount under the eyes and around smile lines. Avoid applying a thick layer over the entire face. When using a cushion or foundation with a relatively matte finish, setting only selected areas may be sufficient. 5. Applying Powder Over Oil Without Blotting First One of the most common causes of thick, patchy makeup is applying powder directly over skin that already has oil, sweat, and existing foundation on it. The powder may mix with the oil and form visible clumps or uneven patches. How to Touch Up Makeup During the Day Use blotting paper or tissue to absorb excess oil first. Press gently instead of rubbing the skin. Use a clean puff or sponge to smooth the patchy area. Reapply foundation only where it has worn away. Lightly set the area with powder. Avoid repeatedly layering both foundation and powder over the entire face, as this will make the base look increasingly heavy. 6. Hot and Humid Weather Heat and humidity can increase oil and sweat production, causing foundation to move or wear away more easily. This is especially common when the formula does not suit the weather or activity. How to Reduce Patchiness in Hot Weather Choose a water- and sweat-resistant foundation. Apply foundation in thin layers. Set only the areas that become oily easily. Carry blotting paper for touch-ups. Avoid rubbing or wiping the face with your hands. Touch up only where needed instead of reapplying the entire base. How to Fix Patchy Makeup During the Day When your makeup begins to look patchy, avoid immediately applying more foundation or powder. Follow these steps instead. Step 1: Remove Excess Sweat and Oil Use tissue or blotting paper and gently press it onto oily areas. Avoid rubbing, as this may remove even more foundation. Step 2: Smooth the Patchy Area Use a clean sponge or puff to press over the area where the foundation has separated or built up. This helps redistribute the existing product more evenly. Step 3: Reapply Only Where Needed Apply a very small amount of foundation or cushion to areas where the makeup has worn away. There is no need to reapply it across the entire face. Step 4: Lightly Set with Powder Once the product has settled, apply a light layer of powder only to areas that become oily easily. Choose Products Based on the Problem Fixing patchy makeup does not always require changing every product in your routine. It is better to identify the cause and adjust the relevant step. Dry or Dehydrated Skin Choose a lightweight skin-preparation serum, such as KMA Glow Dew Serum, to help prepare the skin before applying makeup. Visible Pores or Uneven Skin Texture Use a primer such as KMA Secret Poreless Skin Primer to help prepare areas with visible pores or uneven texture. Foundation Wearing Away Due to Sweat and Oil Choose a formula suited to hot and humid weather, such as KMA Water Resist Liquid Foundation SPF30, which offers water- and sweat-resistant properties and helps control excess oil. Setting the Base Choose a powder that suits your preferred coverage and finish. Use only an appropriate amount and focus on areas where setting is necessary. Before publishing, replace any product or article links using shopifypreview.com with the live URLs on kmacosme.com, as the current page may still contain preview links. Frequently Asked Questions Q: Why does my makeup become patchy even when I use an expensive foundation? A: The problem may not be caused by the quality of the foundation alone. It may also result from dehydrated skin, applying too much skincare, choosing a formula that does not suit your skin type, or using too much product. Q: How can I fix patchy makeup around my nose? A: Blot away excess oil around the nose first. Then use a clean puff or sponge to press and smooth the area before applying a small amount of foundation and powder. Avoid adding multiple thick layers. Q: Why does foundation become patchy on oily skin? A: Excess oil can cause foundation to move or separate, especially when too much skincare has been applied, the skin has not been set properly, or powder is added without blotting first. Q: Should I blot my skin before applying more powder? A: Yes. Always remove excess oil first. Applying powder directly over oily skin may cause it to clump and make the makeup look thicker. Conclusion Patchy makeup can result from several factors, including dehydrated skin, excessive skincare, an unsuitable foundation formula, heavy foundation application, or incorrect touch-up techniques. The most effective ways to prevent it are to prepare the skin with the right amount of skincare, allow each layer to settle, apply foundation thinly, set only selected areas, and blot away excess oil before touching up. By adjusting these steps, your base makeup can look smoother, more natural, and more even throughout the day.

How to Choose the Right Cushion Shade Without Making Your Face Look Too Light
Choosing the wrong cushion shade can make your face look too pale, dull, or noticeably different from your neck—even when the formula and coverage perform well. To choose a cushion shade more accurately, do not consider only whether your skin is fair or deep. You should look at both your skin tone and undertone, then test the shade along your jawline before making a decision. This guide explains how to choose from the six shades of KMA Make Me Matte Cushion, helping you achieve a smoother and more natural-looking complexion. Quick Guide to Choosing a Cushion Shade Before going into detail, follow these four steps: Identify whether your skin tone is fair, medium, tan, or deep. Determine whether your undertone is cool, warm, or neutral. Select two or three shades closest to your complexion. Test them along your jawline and choose the shade that blends most naturally with your neck. The best match should not appear as a visible light or dark stripe. It should blend into your skin with almost no noticeable edge. What Is the Difference Between Skin Tone and Undertone? Many people choose a cushion based only on how fair or deep their skin appears. However, undertone is equally important. Term Meaning Examples Skin Tone The visible depth or lightness of the skin Fair, medium, tan, deep Undertone The underlying colour beneath the skin, which generally changes less Cool, warm, neutral Skin tone may change due to sun exposure or temporary dullness, while undertone generally remains more consistent. This is why people with similar skin-tone depth may still suit different cushion shades. How to Identify Your Undertone Undertones are generally divided into three main groups: cool, warm, and neutral. Undertone General Skin Appearance Suggested Shade Family Cool Pink, red, or bluish tones Start with C shades Warm Yellow, golden, or peach tones Start with W shades Neutral A balance of pink and yellow tones Start with N shades Check the Veins on Your Wrist Look at the veins on your wrist under natural light. Blue or purple-looking veins may indicate a cool undertone. Green-looking veins may indicate a warm undertone. A mixture of blue and green, or veins that are difficult to identify, may indicate a neutral undertone. Compare Silver and Gold Jewellery If silver jewellery makes your complexion look brighter, you may have a cool undertone. If gold jewellery complements your skin more, you may have a warm undertone. If both suit you, you may have a neutral undertone. Check Your Neck and Chest Do not assess your undertone from your face alone. Redness, dullness, or skincare products may make facial skin appear different from your natural tone. Looking at the neck and upper chest may give you a clearer indication of your overall undertone. These methods should be used only as an initial guide. Testing the cushion directly on your skin is still the most reliable way to confirm your shade. What Do C, W, and N Mean on Cushion Shades? KMA Make Me Matte Cushion uses letters to indicate the undertone of each shade. Code Meaning Best Suited For C Cool Pink or reddish undertones W Warm Yellow or golden undertones N Neutral A balanced combination of pink and yellow undertones The number before each letter indicates the shade depth. Lower numbers generally represent lighter shades, while higher numbers indicate deeper shades. KMA Make Me Matte Cushion: Six-Shade Guide KMA Make Me Matte Cushion is available in six shades, ranging from fair skin with pink undertones to deep skin with reddish undertones. Shade Undertone Suitable Skin Tone Compare With 00C Porcelain Cool Fair skin with pink undertones 01N if you are unsure whether your skin is distinctly pink 01N Vanilla Neutral Fair skin with a balanced undertone 00C or 02W 02W Nude Warm Fair skin with yellow undertones 03W if it appears too light 03W Natural Beige Warm Medium skin with yellow undertones 02W 04N Warm Sand Neutral Tan skin 03W or 05C 05C Soft Tan Cool Deep skin with reddish undertones 04N This table is intended as a starting point for selecting shades to test. Actual skin colour and undertone can vary from person to person. How to Test Cushion Shades More Accurately The best area for testing a cushion is along the jawline extending toward the neck. This helps you see whether the shade blends naturally with both your face and neck. Shade-Testing Steps Select two or three shades close to your complexion. Apply each shade in a small stripe along your jawline. Blend the edges slightly. Allow the cushion to set. Check the shades in natural light. Choose the shade that blends most naturally with your neck. Avoid testing only on the back of your hand, as the skin on your hand may differ from your face in both depth and undertone. Why Should You Wait for the Cushion to Set? The colour of a cushion may look different immediately after application compared with how it appears once it has set. While testing, check whether: The shade becomes darker. The colour appears more yellow or pink. The shade still blends with your neck. The appearance changes under natural light. Do not choose a shade while the cushion is still freshly applied and wet. What Should You Do If You Are Between Two Shades? When your skin falls between two shades, prioritise the shade that blends most naturally with your neck. Choose the Slightly Deeper Shade When: Your face is lighter than your neck. You are concerned about your face looking too pale. You prefer a natural-looking finish. Your skin may become deeper after sun exposure. To brighten the centre of the face, use concealer selectively instead of choosing a cushion that is too light for your entire face. Common Mistakes That Make the Face Look Too Light or Dull A mismatched complexion can result from several factors, not only from choosing a shade that is too light. Common mistakes include: Choosing a shade much lighter or deeper than your skin Selecting a cushion with the wrong undertone Testing the shade only on the back of the hand Failing to compare the shade with the neck Choosing a shade only from images shown on a screen Testing under yellow or artificial store lighting Applying too much cushion Layering a powder that is lighter than the cushion Testing along the jawline and checking the shade under natural light can significantly reduce the risk of choosing the wrong colour. Tips for Applying Cushion Naturally Once you have selected the right shade, your application technique will also affect how naturally the colour blends with your skin. Pick up a small amount of product. Start at the centre of the face and blend outward. Apply less product around the hairline and jawline. Build coverage only where needed. Avoid repeatedly layering thick amounts over the entire face. Applying cushion in thin layers helps the shade blend more naturally with both your skin and neck. Frequently Asked Questions Q: Which KMA Make Me Matte Cushion shade is suitable for fair skin with yellow undertones? A: Start by testing 02W Nude, which is suited to fair skin with yellow undertones. If it appears too light, compare it with 03W Natural Beige. Q: Which KMA cushion shade is suitable for tan skin? A: Start by testing 04N Warm Sand, which is designed for tan skin with a neutral undertone. Always test it along your jawline before purchasing. Q: Can I choose a cushion shade from images shown on a screen? A: Screen images can be used as a guide, but colours may vary due to display settings, photography lighting, and individual skin tone. Test the product directly on your skin whenever possible. Q: Which shade should I choose if I am between two shades? A: Choose the shade that blends most naturally with your neck. If you are concerned about your face looking too pale, select the slightly deeper shade and brighten the centre of your face with concealer. How to Choose a Cushion Shade Without Making Your Face Look Too Pale For a more accurate cushion match, consider both your skin tone and undertone rather than choosing based only on how fair your skin appears. Those with pink undertones can begin by testing C shades. Yellow or golden undertones can start with W shades, while those with a balance of pink and yellow can begin with N shades. The most important step is to test two or three shades along the jawline, allow them to set, and choose the one that blends most naturally with your neck. The right cushion shade does not need to make your skin look lighter. It should help your complexion appear smooth, balanced, and naturally even.

How to Choose the Right Blush Shade for Your Skin Tone
Blush is one of the makeup products that can make the complexion look brighter, healthier, and more dimensional. However, many people find that their face looks dull after applying blush, the colour does not complement their skin, or the overall makeup looks unnatural—even when they choose a shade based on reviews or current trends. In fact, choosing a blush shade that suits both your skin tone and undertone can make your makeup look softer, brighter, and easier to coordinate. This article explains how to choose a blush shade for different skin tones, along with practical shade recommendations for everyday makeup. Why Is It Important to Choose a Blush Shade That Suits Your Skin Tone? Blush does more than simply add colour to the cheeks. It can also make the face look more lively, balanced, and dimensional. Choosing a shade that does not suit your complexion may cause problems such as: The face looking dull The cheeks appearing too red or orange The blush colour looking separate from the rest of the makeup The overall makeup looking unnatural The right blush shade can create a naturally flushed appearance and help the entire makeup look softer and more harmonious. How to Choose Blush According to Your Skin Tone Fair Skin with Pink Undertones Fair skin with pink undertones usually suits light pink, rose-petal pink, and pastel pink shades. These colours can make the complexion look fresh and naturally radiant. Recommended Shades #04 Misty Rose #05 Dusty Pink #06 Soft Candy Pink These shades are suitable for sweet makeup looks, Korean-inspired makeup, and everyday wear. Fair Skin with Yellow Undertones Fair skin with yellow undertones generally suits peach, coral, and apricot shades. These colours can brighten the complexion without making it appear more yellow or washed out. Recommended Shades #01 Muted Apricot #02 Fresh Coral #03 Soft Peach These shades are suitable for natural makeup, workday looks, and everyday wear. Medium or Tan Skin Medium or tan skin can wear a wide range of blush colours, but shades with slightly richer pigmentation tend to show more clearly and blend more naturally with the complexion. Coral, muted pink, and deeper peach shades are good options. Recommended Shades #02 Fresh Coral #04 Misty Rose #05 Dusty Pink Deep or Tanned Skin Deeper or tanned skin generally suits warm shades such as coral, apricot, and muted pink. These colours can brighten the face without making the blush look disconnected from the skin. Recommended Shades #01 Muted Apricot #05 Dusty Pink Choose Blush According to Your Undertone Undertone Recommended Blush Shades Warm Tone Apricot, coral, peach Cool Tone Pink, rose, dusty pink Neutral Tone Both peach and pink tones When you are unsure whether your undertone is warm or cool, start with peach or muted pink. These shades are generally easy to wear and suit a wide range of complexions. KMA Cloudy Blush Shade Guide Shade Recommended For Overall Look #01 Muted Apricot Yellow undertones and tanned skin Bright, warm, and natural #02 Fresh Coral All skin tones Healthy and fresh #03 Soft Peach Fair skin and fair skin with yellow undertones Soft and youthful #04 Misty Rose Fair skin with pink undertones Sweet and elegant #05 Dusty Pink Medium, tan, and deeper skin tones Polished and easy to wear #06 Soft Candy Pink Fair skin Bright and playful How to Apply Blush Naturally In addition to choosing the right shade, the application technique also affects the final result. Pick up a small amount of blush and gradually build the colour. Apply from the apples of the cheeks upward toward the cheekbones to create a lifted appearance. Blend the edges until there are no harsh lines. Choose a finely milled blush that blends smoothly with the skin. Why Is KMA Cloudy Blush Suitable for Everyday Makeup? KMA Cloudy Blush is designed to be easy to use and create a natural-looking finish. Its key features include: Soft Blur Effect Helps blur the appearance of skin texture and pores, leaving the cheeks with a soft-focus look. Smooth & Non-Drying Texture The finely milled texture blends easily, does not appear overly powdery, and helps reduce the appearance of dryness or creasing. Natural Glow Finish Gives the cheeks a fresh, healthy-looking glow without appearing patchy. Long-Lasting Wear and Good Adhesion The colour adheres well to the skin and is designed to remain in place throughout the day. Skin-Conditioning Ingredients The formula contains six botanical oils and Vitamin E to help the skin look moisturised and prevent a dry, powdery appearance. KMA Cloudy Blush is available in six shades across peach, coral, and pink colour families, making it suitable for different skin tones and makeup styles. Conclusion Choosing a blush shade that suits your skin tone can make your makeup look more natural, brighten the complexion, and reduce the chance of the cheeks looking dull or disconnected from the rest of the face. When you are unsure where to start, choose a shade that is close to your undertone and easy to wear in everyday life. For those looking for a smooth, blendable, and long-lasting blush, KMA Cloudy Blush is a versatile option. It offers a range of flattering shades, a soft-blur finish, and an easy-to-use texture suitable for different skin tones. Frequently Asked Questions About Choosing Blush for Your Skin Tone Q: Which blush shades are suitable for fair skin? A: Fair skin generally suits light pink, rose, and soft peach shades, such as Misty Rose, Soft Candy Pink, and Soft Peach. These colours can make the complexion look bright and natural. Q: Which blush colours are suitable for yellow undertones? A: Peach, apricot, and coral shades are recommended, such as Muted Apricot, Fresh Coral, and Soft Peach. These colours can help the complexion appear brighter and less dull. Q: Can medium or tan skin wear pink blush? A: Yes. Choose a slightly muted pink shade, such as Dusty Pink, which blends more naturally with medium and tan skin tones. Q: Should I choose blush according to my skin tone or undertone? A: When you know your undertone, use it as the main guide because it can help you choose more accurately. When you are unsure, selecting blush according to your visible skin tone is still a practical starting point. Q: Why does my face look dull after applying blush? A: The blush shade may not complement your skin tone, or the colour may have been applied too heavily. Choosing a suitable shade and blending it softly can help the complexion look brighter and more natural.
บทความล่าสุด
เรื่องราวและเคล็ดลับความงามสำหรับคุณ